Few tasks in facility maintenance are as crucial yet often overlooked as floor stripping and waxing. The sparkle of a freshly waxed floor not only enhances aesthetics but also prolongs the lifespan of your flooring, protecting it from daily wear and tear. However, achieving that pristine finish requires more than elbow grease; it demands a systematic approach and attention to detail.
This comprehensive guide delves into the essentials of floor stripping and waxing, providing a step-by-step roadmap for novices and seasoned professionals. Each process phase is meticulously outlined to ensure optimal results, from preparing the workspace to selecting the suitable stripping agents and waxing techniques.
So, whether you’re revitalizing tired linoleum in a commercial space or maintaining the luster of hardwood at home, join us as we navigate the intricacies of floor stripping and waxing.
Workspace Preparation: Setting the Stage for Success
Thorough workspace preparation is crucial before starting the floor stripping and waxing process. Clear the area of obstacles and debris to create a safe, efficient environment.
Assess the flooring condition for repairs and ensure proper ventilation by opening windows and using fans to mitigate fumes from stripping agents. Lastly, organize all needed supplies for easy access. These steps establish the groundwork for a successful restoration, guaranteeing optimal results.
Selecting the Right Tools and Materials: Key Ingredients for a Flawless Finish
Selecting the right tools and materials is essential for achieving a flawless finish in floor stripping and waxing projects. High-quality equipment and products not only streamline the process but also ensure long-lasting results that enhance the beauty of your floors.
- Floor Stripper: Choose a high-quality floor stripper formulated explicitly for your flooring type to effectively remove old wax layers without damaging the surface.
- Applicator Tools: Invest in sturdy mops, scrub brushes, and floor squeegees to facilitate applying and removing stripping agents and wax.
- Quality Wax: Choose wax products designed for your flooring type to ensure durability and longevity. These products protect your floors while enhancing their shine.
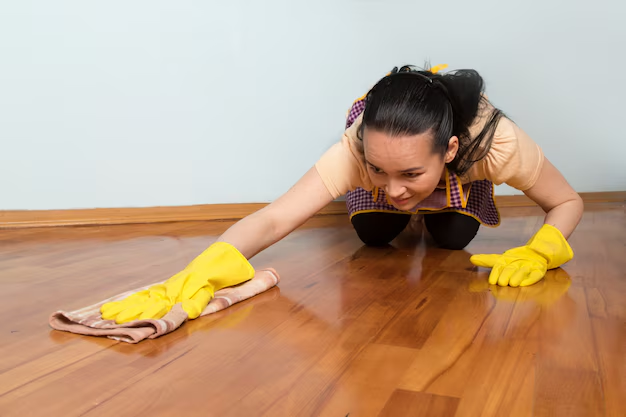
- Safety Gear: Pay attention to the importance of safety gear, such as gloves and goggles, to protect yourself from harsh chemicals during the process.
- Read Labels: Carefully read product labels to ensure compatibility with your flooring type and follow manufacturer instructions for optimal results.
By meticulously curating your toolkit with these key ingredients, you set the stage for a flawless finish that stands the test of time, ensuring your floors remain stunning for years.
Stripping Away the Old: Techniques for Effective Floor Preparation
Stripping away the old wax buildup is critical in revitalizing tired floors, preparing them for a fresh new finish. Adequate floor preparation ensures thorough stripping and sets the stage for a flawless final result.
- Clearing the Area: Begin by removing all obstacles, furniture, and debris from the workspace to create a safe and spacious environment conducive to efficient work.
- Assessing the Flooring: Evaluate the condition of the flooring, identifying any areas that may require special attention or repair before proceeding with the stripping process.
- Proper Ventilation: Ensure adequate ventilation by opening windows and using fans to promote air circulation, minimizing exposure to solid fumes emitted by stripping agents.
- Applying the Stripper: Apply the chosen stripping agent according to the manufacturer’s instructions, working in small sections to ensure thorough coverage and allowing sufficient time for the wax layers to soften.
- Agitating and Removing: Agitate the surface with a scrub brush or floor machine to loosen stubborn buildup, then use a floor squeegee to remove the dissolved wax and stripper, working in the direction of the floorboards to prevent streaking.
Adequate floor preparation is essential for successfully stripping away old wax layers, laying the groundwork for a pristine finish that showcases the natural beauty of your flooring.
Applying Wax: Mastering the Art of Floor Enhancement
Applying wax is crucial in stripping and waxing, turning dull floors into stunning focal points. Start by evenly spreading a small amount of wax using a mop or applicator pad, working in small sections to ensure uniform coverage. Avoid overapplication to prevent streaks and a sticky finish.
Let the first coat dry completely before adding subsequent layers; typically, two to three coats suffice for optimal protection and shine. After the wax cures, use a high-speed floor buffer or burnisher to buff the floor to a brilliant sheen, enhancing the wax’s luster and sealing and protecting the flooring surface. With practice, you can master floor enhancement, elevating any space’s aesthetic appeal.
Buffing and Polishing: Transforming Floors from Dull to Dazzling
Buffing and polishing are essential final steps in floor maintenance, imparting a brilliant sheen to surfaces. After the wax cures, employ a high-speed buffer or burnisher with a polishing pad. Methodically move the machine, ensuring overlapping passes for even coverage.
Focus on edges and corners where buildup may occur. Monitor the pad’s condition and replace it as needed for optimal performance. Friction from buffing enhances wax shine and smoothens surface imperfections, leaving floors flawless. With care and precision, even dull floors can become radiant centerpieces.
Maintenance Tips: Sustaining the Shine for Long-Term Brilliance
Sustaining the shine of freshly stripped and waxed floors requires diligent maintenance and care. Implement a regular cleaning schedule, sweeping or vacuuming daily to remove dirt and debris that can dull the surface. Use a neutral pH cleaner diluted in water to mop the floor regularly, avoiding harsh chemicals that can strip away wax and damage the finish.
Invest in entrance mats at doorways to trap dirt and moisture before it reaches the floor, reducing the risk of scratches and stains. Promptly address spills and stains to prevent them from setting into the wax layer, blotting them with a clean cloth and mild detergent.
Periodically buff the floor with a high-speed buffer to revive the shine and extend the lifespan of the wax. By incorporating these maintenance tips into your routine, you can enjoy the brilliance of your newly stripped and waxed floors for years.
Achieving impeccably stripped and waxed floors requires meticulous preparation, precise execution, and consistent maintenance. Follow our step-by-step guide to revitalize tired flooring, whether a commercial property or your home.
With over 20 years of professional experience and locations in Topsail, Surf City, Richlands, and Jacksonville, our bonded and insured cleaning business is here to help. Contact us at 910-333-3231 to schedule your floor stripping and waxing service today. Your floors deserve the best care to maintain their brilliance for the long term.